Bathroom Install.. adding a much needed second bathroom!
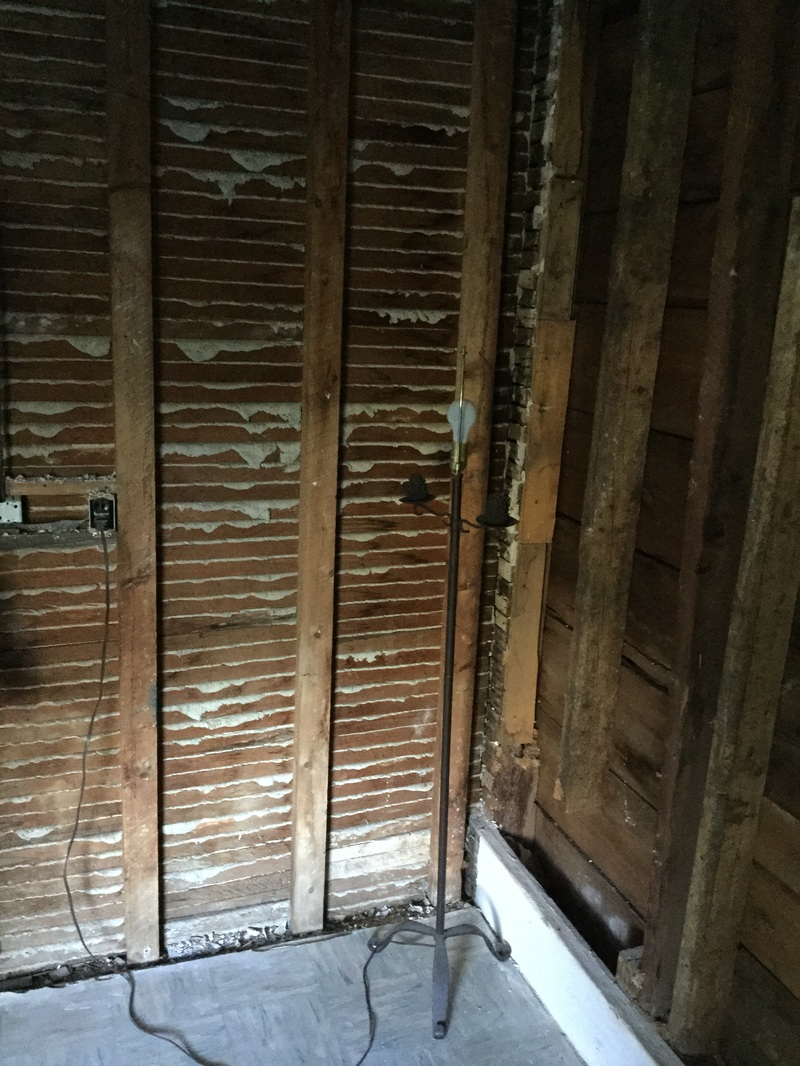
One of the biggest problems we faced when buying this old farm house, was having only one very outdated, grungy, and out of the way bathroom located just off the kitchen. It has a weird set up with cabinets cutting off the sink area, a cabinet in the shower and a door that is on a diagonal to the rest of the room. Oh did I mention that the shower head is so low that you have to bend down to rinse your hair? Yes short people must have lived in this house!!
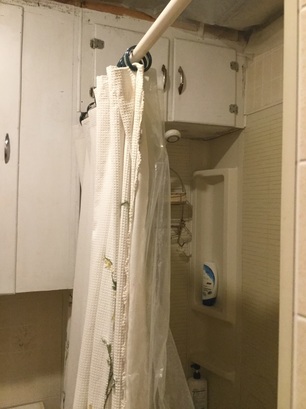
Yes you can see our dilemma in the picture above! Another issue was, lets face it, I am getting older and can't make the whole night without using the toilet. Which translates to my having to circumvent the narrow hallway, steep stairs, living room furniture, dogs, half doors, and kitchen in order to reach the toilet - in the dark! Yes accident waiting to happen for sure. I did this for over 1 1/2 years without incident. But would arrive back to bed so awake I would have a hard time getting back to sleep. I was done! So we put some projects that we had going on hold and made the decision to install a new bathroom upstairs.
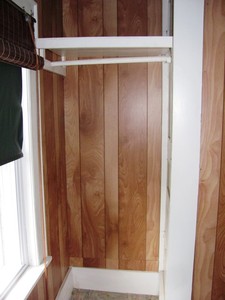
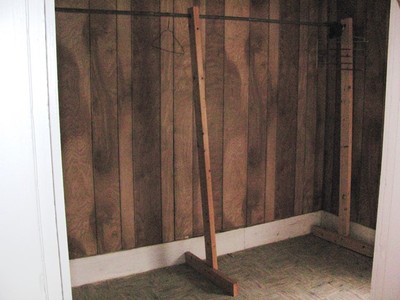
Our first decision was where to put it. We have supposedly five bedrooms upstairs, two of which we have already renovated with new insulation, wiring and got rid of the paneling! Out of the other three, one is a larger bedroom that the girls had been sharing since Ben moved back in. The other two are more closets than bedrooms, as all they will fit is a twin bed and maybe a set of draws for holding clothes. One has a built in cupboard with a closet area, shelves and some draws - Ariana wanted her own room and has chosen to move into this room. That left the one small room with the door to the attic in it. And conveniently, it is right above the bathroom downstairs! Decision Made!
Our first decision was where to put it. We have supposedly five bedrooms upstairs, two of which we have already renovated with new insulation, wiring and got rid of the paneling! Out of the other three, one is a larger bedroom that the girls had been sharing since Ben moved back in. The other two are more closets than bedrooms, as all they will fit is a twin bed and maybe a set of draws for holding clothes. One has a built in cupboard with a closet area, shelves and some draws - Ariana wanted her own room and has chosen to move into this room. That left the one small room with the door to the attic in it. And conveniently, it is right above the bathroom downstairs! Decision Made!
Demolition Day!
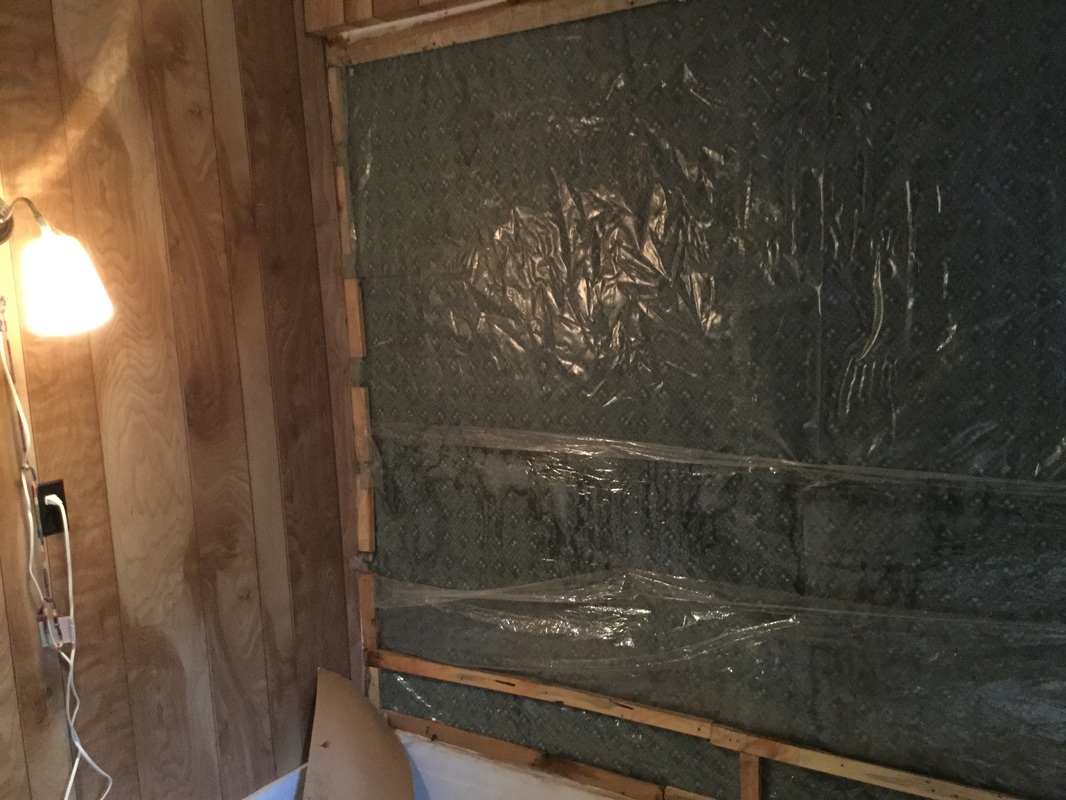
First things first, we needed to clean out the room as it was being used as a closet and storage for us. This required some reorganizing and installing some flooring in the attic, which has none! I still can't believe a 150 year old house and no one has ever put flooring in the full walk up attic! Once the room was cleaned out, we could start tearing down the paneling to see what was found behind it. I was very surprised for sure when what was discovered was sheetrock and wallpaper! So this room had been re-done in the last 50 years or so. But, the room was cold, needed new wiring and we needed a blank canvas, so the sheetrock needed to come down.
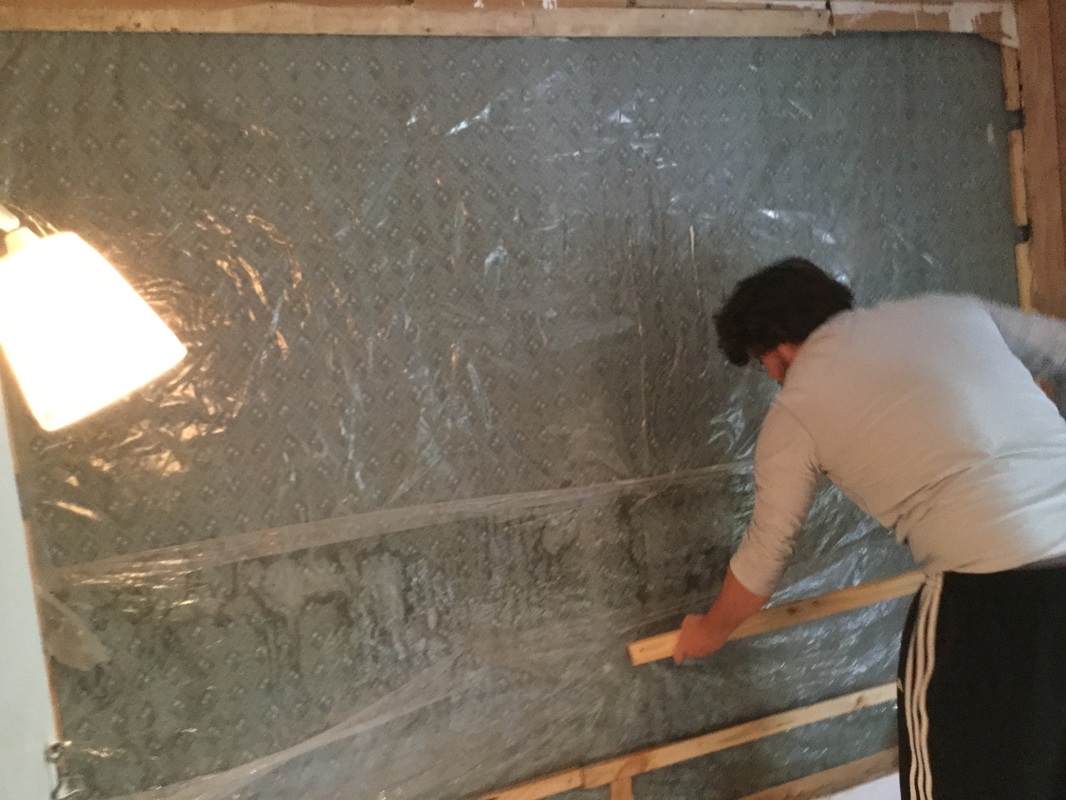


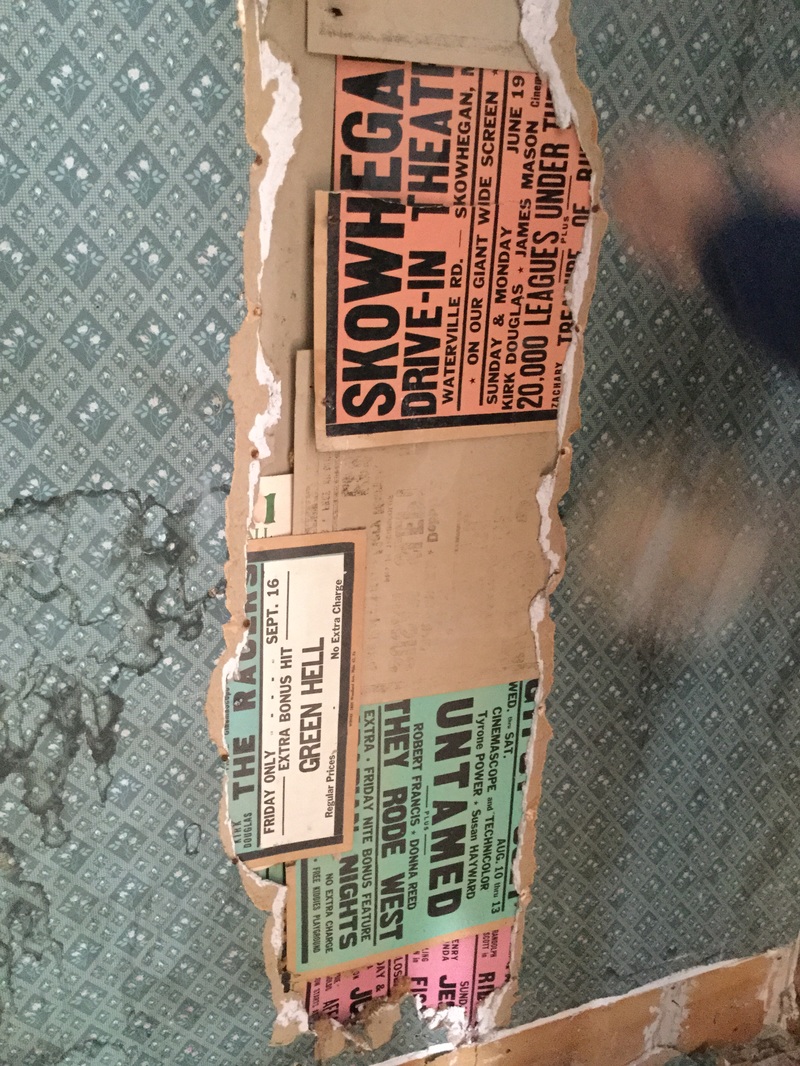

Wow! No wonder we were cold! It was a good thing we decided to do this as under the sheetrock we found movie posters that had been used as a vapor barrier. Kind of cool but unfortunately not worth a whole heck of a lot with nail holes and water stains. But nostalgically, it is local history from the late 50s and early 60s that is priceless to some folks. Behind the movie posters... nothing. Yup just the outside wall with no insulation! And many holes that we could actually see outside where the clapboard has split. So it is a good thing we chose this room for sure! Just imagine the heat we lost in the cold winters!
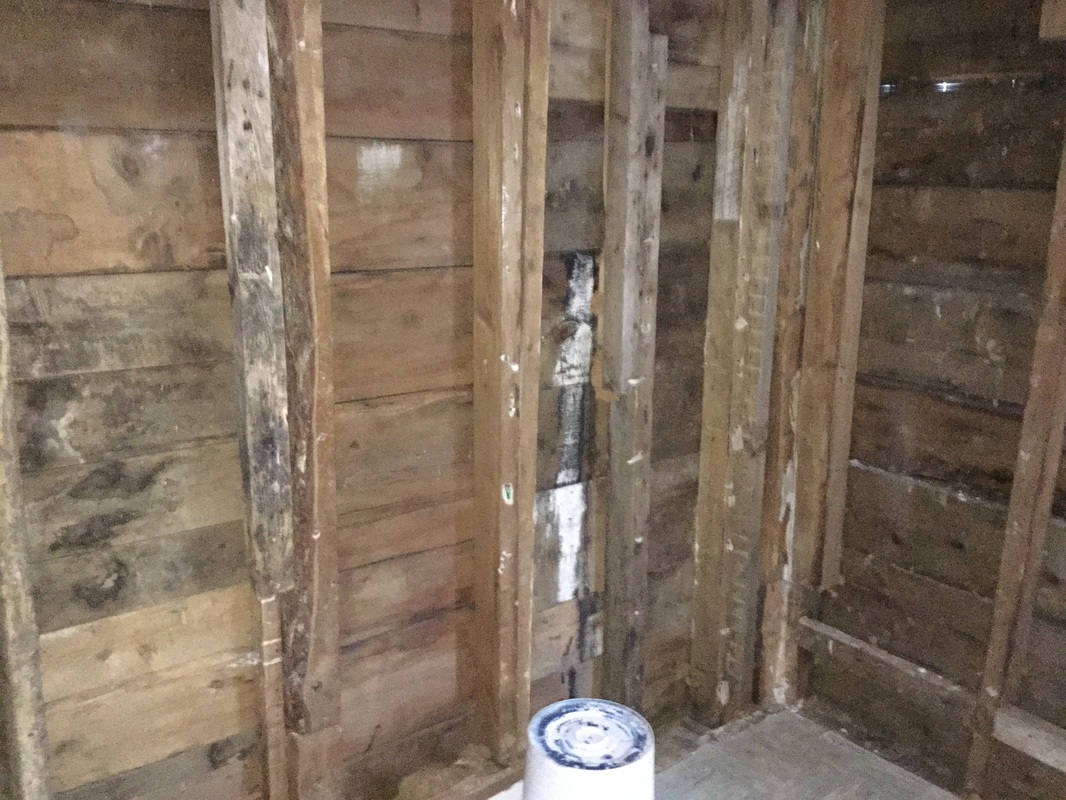
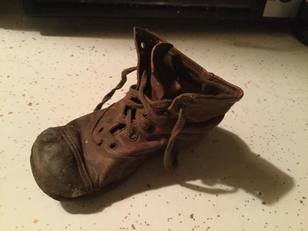
Once the walls were open, we could now begin again with reinforcing old boards that didn't look so good, installing all new insulation, apply a proper vapor barrier, and layout the room design. Which meant semi-demolishing the downstairs bathroom so we could access the floor above and run all new plumbing. This exposed some old fire damage that was never disclosed in the sale of the house. Not sure if it was supposed to be, but our downstairs bathroom smells like an old smokehouse! We also discovered some hidden treasures.. one of which is this old shoe pictured below. I wasn't quite sure at first why/how this shoe got into the ceiling until I posted it on my facebook page and a friend of mine informed me that old houses sometimes had these as protective charms to ward off evil and bring luck to the house/family! So needless to say, when we renovate the downstairs bathroom, this old shoe will be once again returned to the house!
Once the walls were open, we could now begin again with reinforcing old boards that didn't look so good, installing all new insulation, apply a proper vapor barrier, and layout the room design. Which meant semi-demolishing the downstairs bathroom so we could access the floor above and run all new plumbing. This exposed some old fire damage that was never disclosed in the sale of the house. Not sure if it was supposed to be, but our downstairs bathroom smells like an old smokehouse! We also discovered some hidden treasures.. one of which is this old shoe pictured below. I wasn't quite sure at first why/how this shoe got into the ceiling until I posted it on my facebook page and a friend of mine informed me that old houses sometimes had these as protective charms to ward off evil and bring luck to the house/family! So needless to say, when we renovate the downstairs bathroom, this old shoe will be once again returned to the house!
Layout of the bathroom was a bit tricky, as we had all new plumbing to run, new electrics to install, an attic door to contend with, an old cast iron vent pipe to remove, and a narrow hallway to get to the room itself! And we wanted to keep the bathroom in style of the house.. so not too modern! After many discussions and ok I admit, a few heated ones too, Jon and I decided that the tub/shower and toilet would be along one wall and the sink would be across from the tub along the other wall. This allowed us access to the attic when needed. It would also allow us to be able to convert and old dresser we had into the sink/vanity like I have always wanted to do. So while Jon began the tedious job of plumbing, wiring and sheet rocking, I began the transformation of the dresser.
It was a lot of fun doing the dresser and I am quite happy with the results! Of course Jon helped a little :D especially with the plumbing and cutting the inside of the draws to accommodate the sink and fixtures. But all in all it is a job well done and really fits in with the house.
It was no easy job to run new plumbing into the room either. We decided to use the pex line again like we had in the other house and all new PVC piping for the drains and vents. This meant we had to literally replumb the whole house so that everything fit together and we had no leaks. Removing the old cast iron drain pipe/sewer line was a job in itself as it weighs a ton and requires a special blade to cut it. We ended up having to replace one whole section of roofing to remove the old vent pipe, which was leaking pretty badly for many years.
But with a lot of hard work, long nights and weekends, the room quickly took shape. The highlight of the whole job? The first night I could walk into this room and use the toilet! Yes I did a happy dance for sure!!
Once the toilet was installed, the tub/shower and the flooring was put in, we could begin the fun part of decorating. We ended up using the wainscoting that we took down at the other house on the walls, put all new baseboard trim, window trim which included a shelf over the window, new recessed lighting into the ceiling (led of course) and we even wall papered the ceiling to look like old tin with faux beams made from timber off the old house. Reuse recycle I always say! And although the hallway/entry still needs to be finished, the following slide show is what the bathroom looks like today. Still need a few more decorations like some pictures for the wall but you will get the idea. It isn't quite primitive but isn't quite 1863 farm house either.. something in between which is just perfect for us. Hope you enjoy!
