Building a 6'x6' Backyard Chicken Coop
One of the items on our to do list when we moved the homestead was to build the chickens a new coop. Of course with everything going on last summer and fall then winter setting in, this one project was put on the back burner. But now that spring has sprung and it is almost garden planting season, it is time to get these girls (and guy) a new home with a large run too! So going off a quick sketch Jon made on the Friday night, we started first thing on a Saturday morning by going down to get a few sheets of 1/2" plywood and 8 2"x4"x8's. The rest of the building materials, windows, roofing, screws, door hardware etc.. we have from the other house. And yes starting in the morning meant by the time we ran errands and got back home it was almost noon already!! LOL oh well that happens sometimes right?
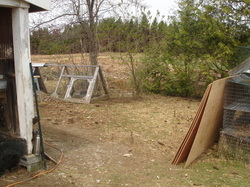
First things first, is location, location, location. With all the trees gone now you would think we would have more space than we needed to put anything we want. Unfortunately until we can remove debris, destump and bring in fill we really can't use the harvested area. We also want the chickens near the house to make winter accessibility easier as well as protection from things like coyotes and raccoons. An East facing location they say is best which we tried to do. Building wise the more level the area the better. So after contemplation of about 2 weeks we finally decided to build the coop where we had the geese last year and next to the vinyl shed we have for storage. So in the end we have a more South facing location which has sun and shade areas as well as being near the water and feed storage. Once constructed, we could move the coop, but we would much rather build it where it is going to stay. Now construction can begin.
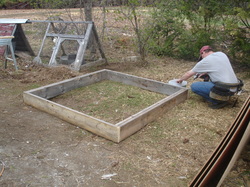
We started by building the base using recycled 2"x8" lumber we had from the work room we disassembled from the other house. It is important to make sure the base is level, so once made, we began to remove or add soil where needed to make it as level as possible. You also need to make sure your measurements are accurate as well, or your building may end up not square. You can check this by measuring corner to corner across the base frame like an "X". If the two measurements are the same you are perfect, if not you will need to shift the base until it is. After that is done it is building time!
Next we built the back and front walls. The back will be a shorter 4 foot wall and the front wall will be almost 6 foot higher than the base. The back wall will be the roost area and the front wall will have windows and the external nesting boxes. Once erected, Jon added bracing to support the walls until the rest of the walls and roof are secure. Next comes side walls and the roof system. It is important to check that the building is still square from time to time adjusting the bracing as needed. You wouldn't want your coop to flare out when putting the roof on! One of the tricky parts of building is working around the spectators who come to see what it is you are doing. As you can see from the photos, the chickens were definitely curious as to what we were up to and very delighted when we started digging up some dirt Some of the girls were even lucky enough to get a worm or two!!
When designing the coop, we went with nesting boxes that we could check from the outside to make egg gathering easier. We set the box height at 18" off the ground and each box is roughly 13"x12" or so.. we were able to fit in 5 which should be plenty for our flock of 14 hens. We hinged the roof as well as the front of the nesting box so we can gather eggs from the top, but have the ease of dropping the front part for housekeeping. Above the nesting boxes we used two basement sized windows we had from the other house. We could have used bigger ones but we used what we had. These should be sufficient enough to allow light in as well as air circulation. The door is 3ft wide by about 5 ft high and was made from one of the doors we had at the other house. This will allow us to be able to get into the coop when needed for cleaning.
The opposite wall has a 18" square opening that will allow the chickens to exit into the run area when open. Jon has come up with a design to have a pull system which will open the door without us having to go into the coop itself to open it. I will take more pictures of this when it is complete. We plan to have a self feeding system as well as using the water system we made at the other homestead which should make our chickens virtually self sufficient during the spring through fall seasons! Here is a slide show of the rest of the build. All that is left is adding the roosts, building the run and a door handle for the coop door! Oh yeah and painting it :D Enjoy!
