Custom Mystical Fantasy Room
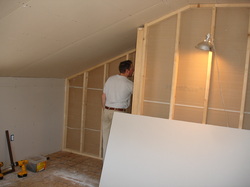
Jon putting up the drywall
So with Ariana's horse barn room done it was time to work on Abbie's Mystical Fantasy Room that she asked for. Of course with a woodland theme and a Dragon!! But the first task that needed to be done was to move Ben's stuff from the front bedroom and put drywall on all the walls. We would also need to build a closet area where there was just an open hole.
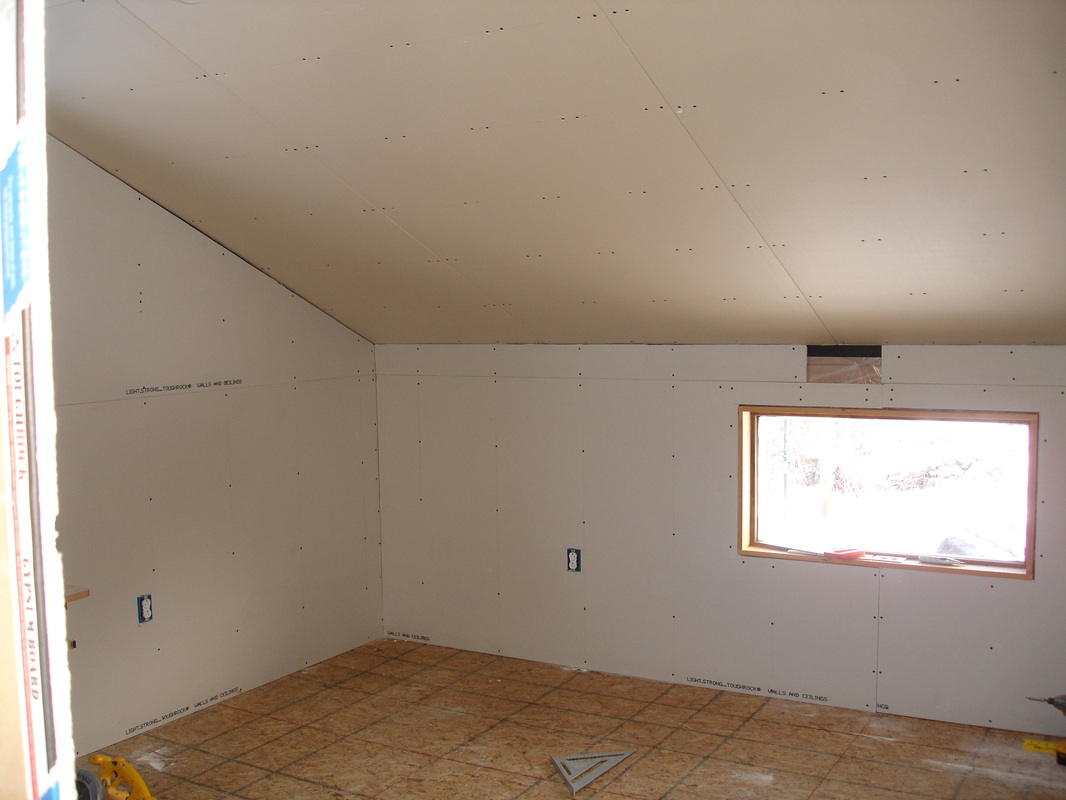
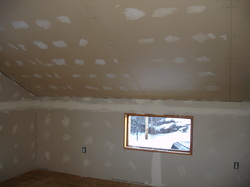
Drywall hung and ready for compounding joints and screwholes
Drywall and compounding...
Polka Dot ceiling..
Once all the drywall was hung we started doing the long drawn out job of compounding all the screw holes and seams. This is one of the worst jobs in the winter when all the windows are closed and we had to use supplemental heating in the room to make sure the compound dried as fast as we could get it to dry. At this point we were ready to chose paint colors and start painting!
Painting
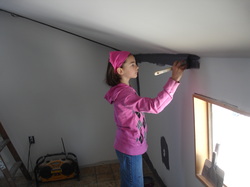
Abbie painting
With Abbie being a bit older then Ariana, she was able to help more in the decorating of her room. She wanted to go with two shades of purple, a darker tone for the ceiling and short wall and a lighter shade for the two opposing walls. We had an idea for colors but it wasn't until we went to Home Depot that we decided on two colors that just happen to be in their oops pile! So for $7.00 a gallon we got the two colors she wanted!
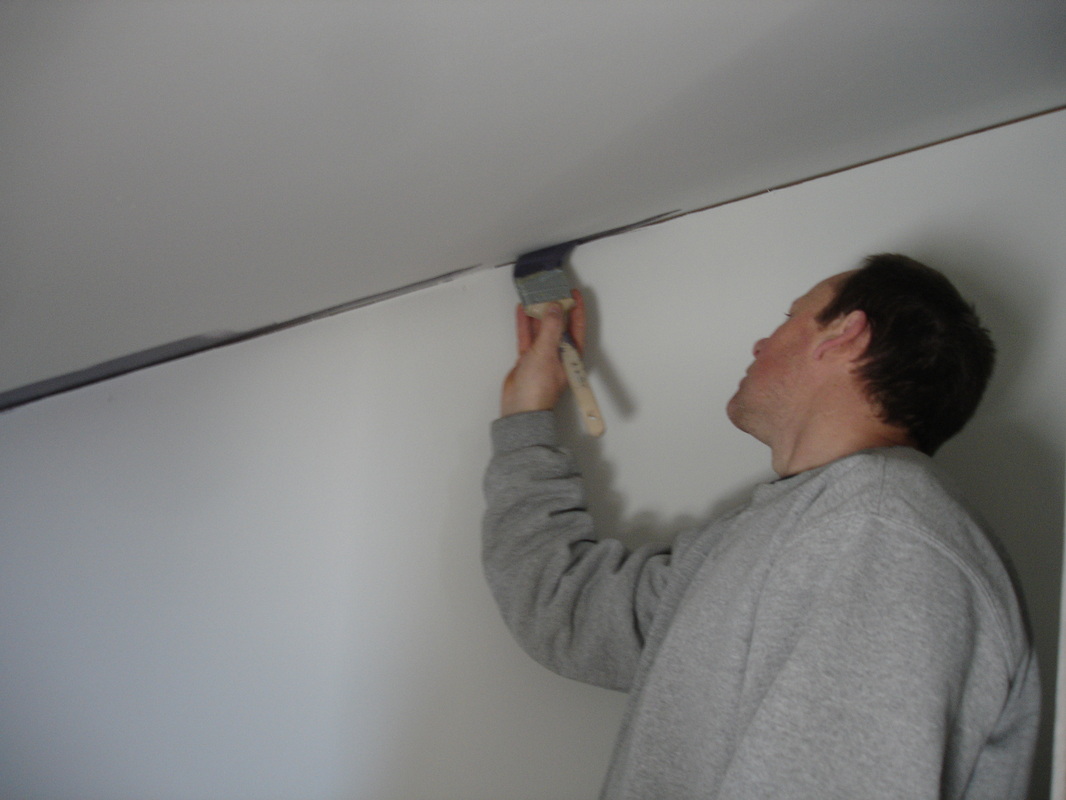
Jon cutting in the edging along the ceiling
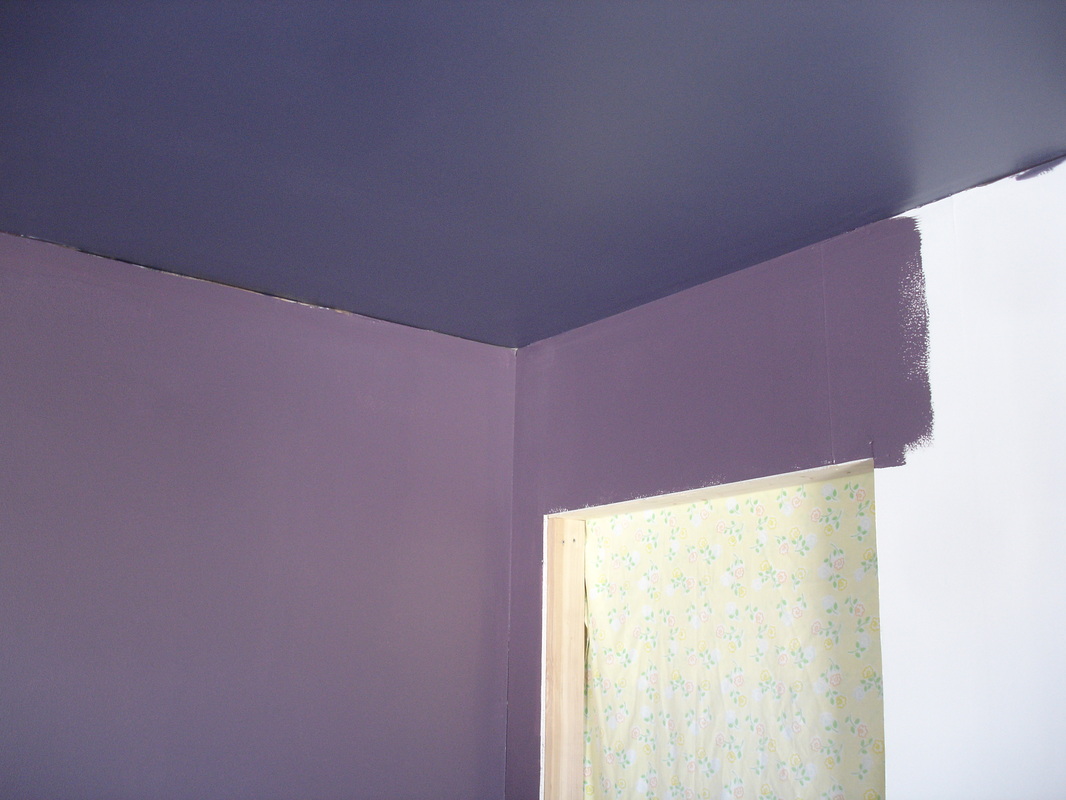
The 2 shades of purple used for the room.. both oops gallons from Home Depot
Time to hang another Mural...
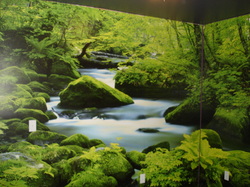
Woodland theme mural
After we decided on a mural to hang in Ariana's room we couldn't very well do Abbie's room without a mural too! So in trying to keep within the budget and the theme of the mystical fantasy room we found this very lush green looking one that was over 8 foot tall and 12 foot long... thus it took up one whole wall and then some. We actually hung it to wrap around a 3 foot section on one wall anticipating that she will put the head of her bed there to make it feel like she is actually in the woods when sleeping. And what better way to bring in the woods then to have a trellis of birch saplings suspended from the ceiling which we can hang some ivy, flowers and some sparkly ornaments from. That way the fairies will have some place to live and fly to when they move in.
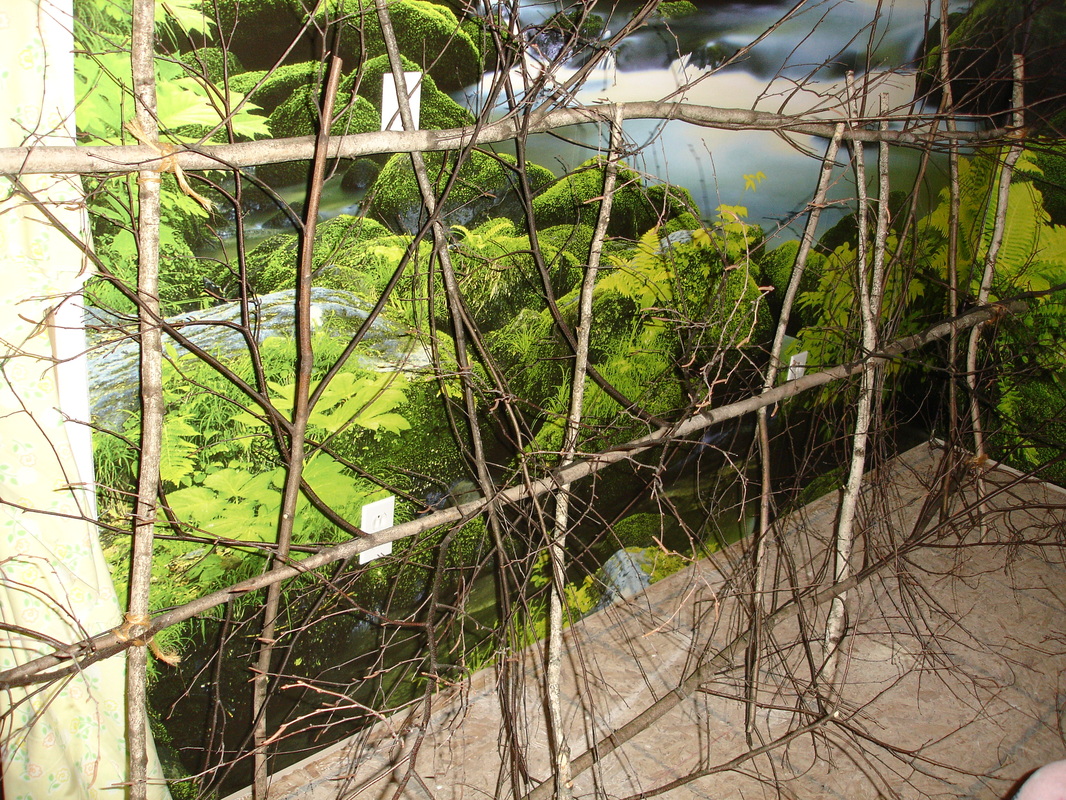
Making a trellis from birch tree saplings
A Dragon is born!
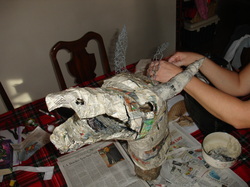
Making a dragon
Abbie asked to have a dragon in her room. Well we tried to find one online that we could afford and that would keep in with the theme of the room. Not too scary, not too big... well it wasn't happening. So I decided to try my hand out with paper mache and make a dragon. Starting with a chicken wire base I began first to wrap layers of newspaper strips to form what I thought a dragon would look like. The following slide show will show you a dragon come to life stage by stage...
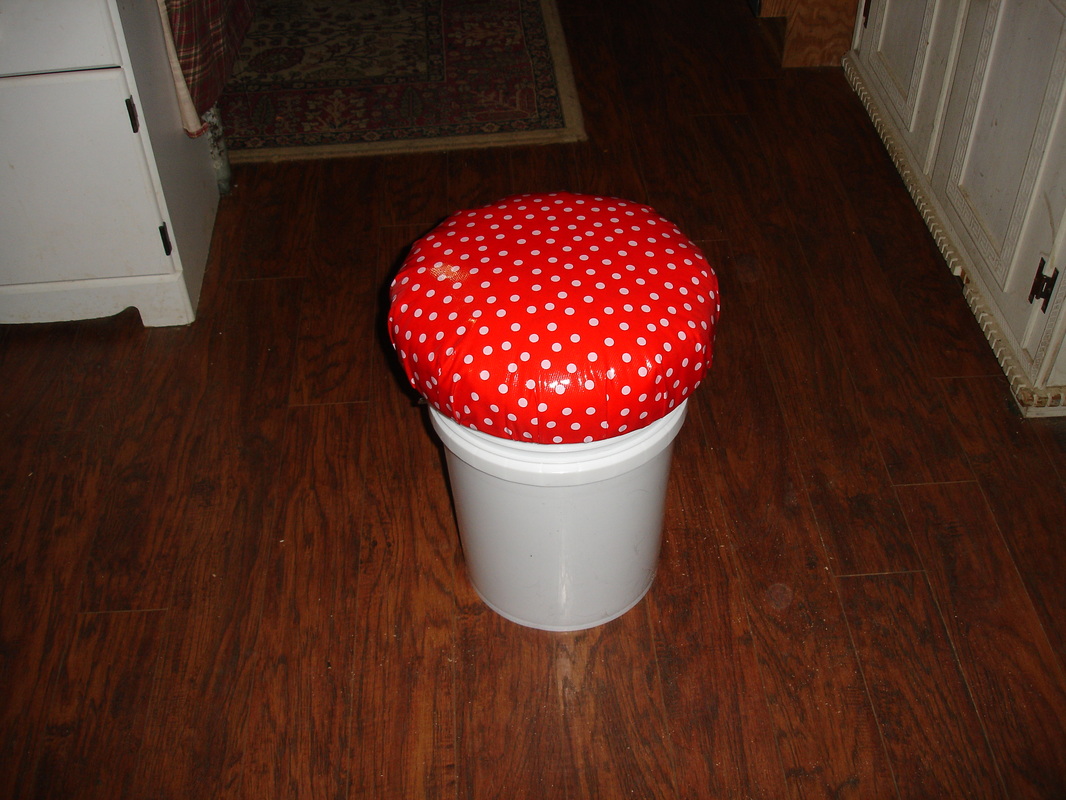
Making mushroom seats
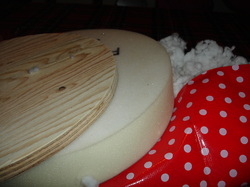
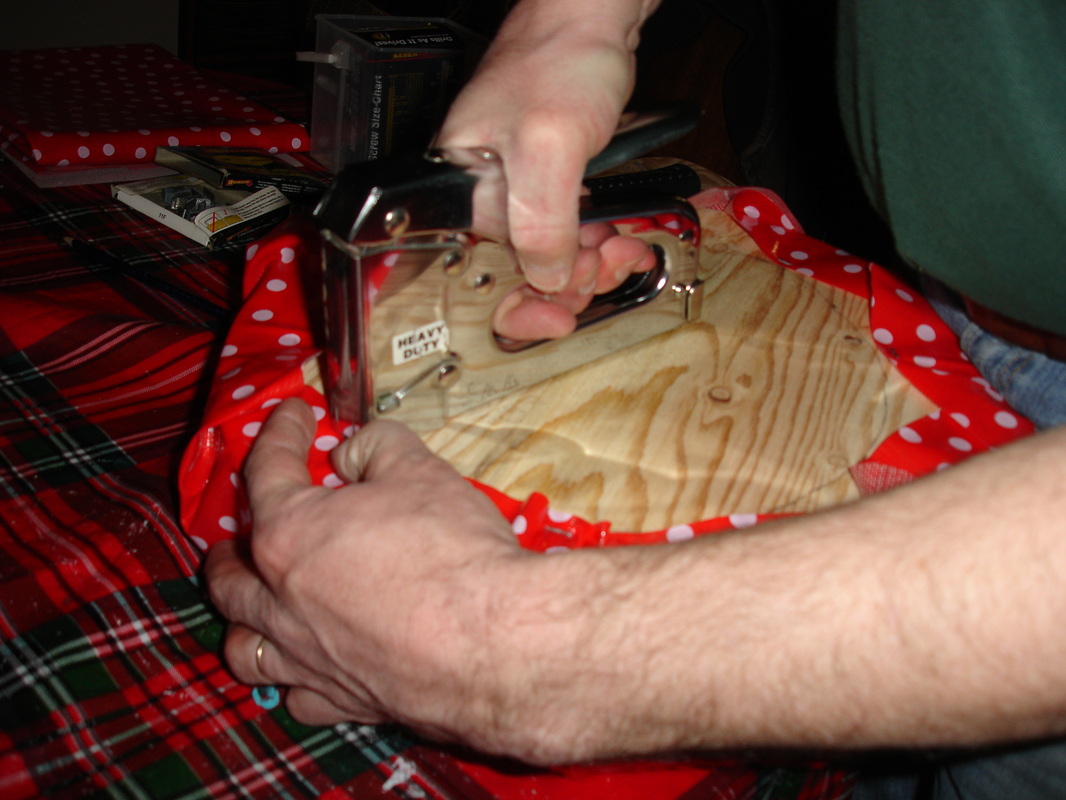
We thought with a woodland theme we might as well have a few mushrooms (toadstool) seats.. so I had found a few ideas online that used logs for the stem and made caps from vinyl.. since we have an issue with storage in our house, I thought heck why not use white 5 gallon buckets as the stems and attach the lids to the mushroom caps so that Abbie can store things inside. So I first found the buckets, cleaned off the painted safety label and removed the handle. Using the foam circle as a template, we made a wood circle base to attach the lid to and then found some vinyl polka dot fabric to use as the top of the seat.
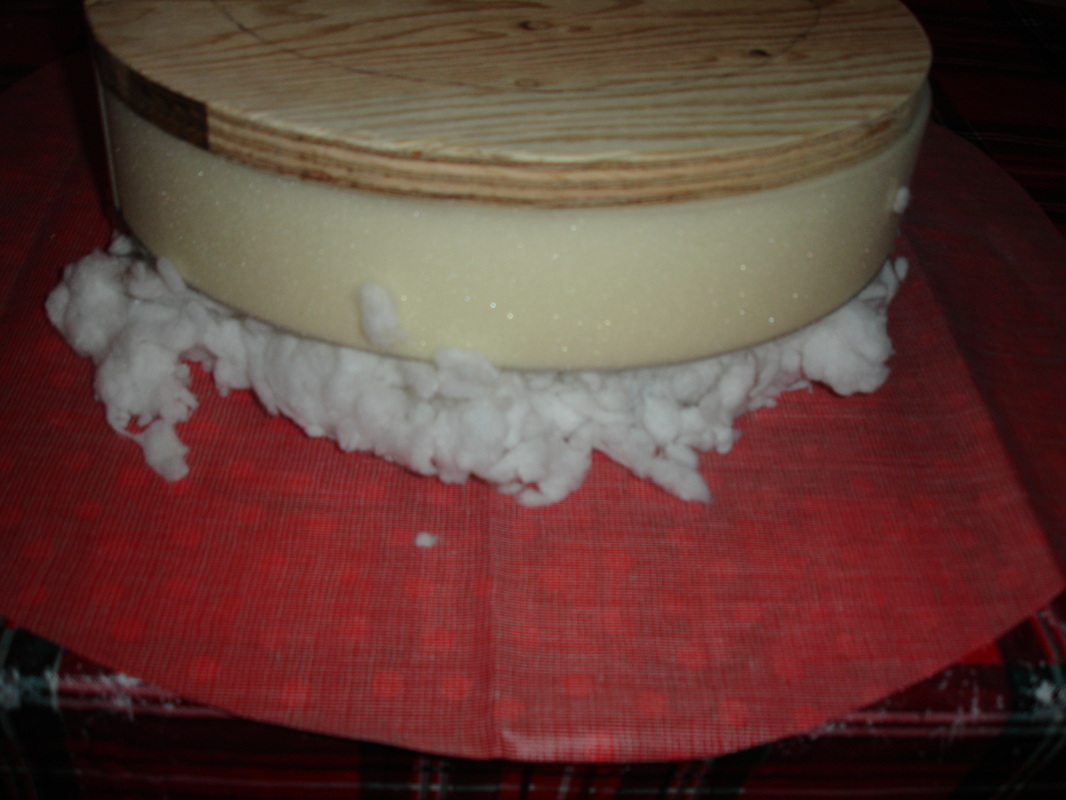
I used the stuffing from an old pillow to give the top of the mushroom a bit more height and volume. After cutting the vinyl into a circle, I layered the vinyl, stuffing, foam and board together as a sandwich. Then using a stapler, we attached the vinyl to the board the way you would recover a chair seat. Remember to attach the fabric by working across.. so if you staple in front of you (bottom) the next staple would be directly above that (top) then the left is stapled followed by the right.. then turn circle 1/8 and staple in order again.
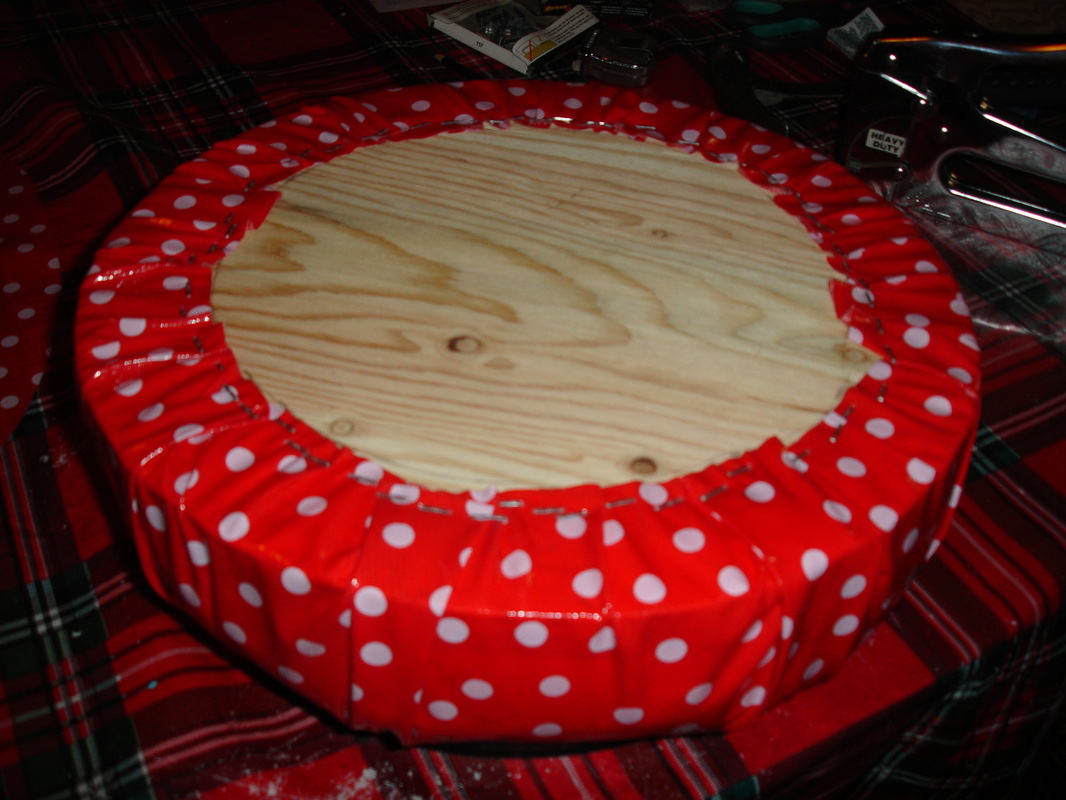
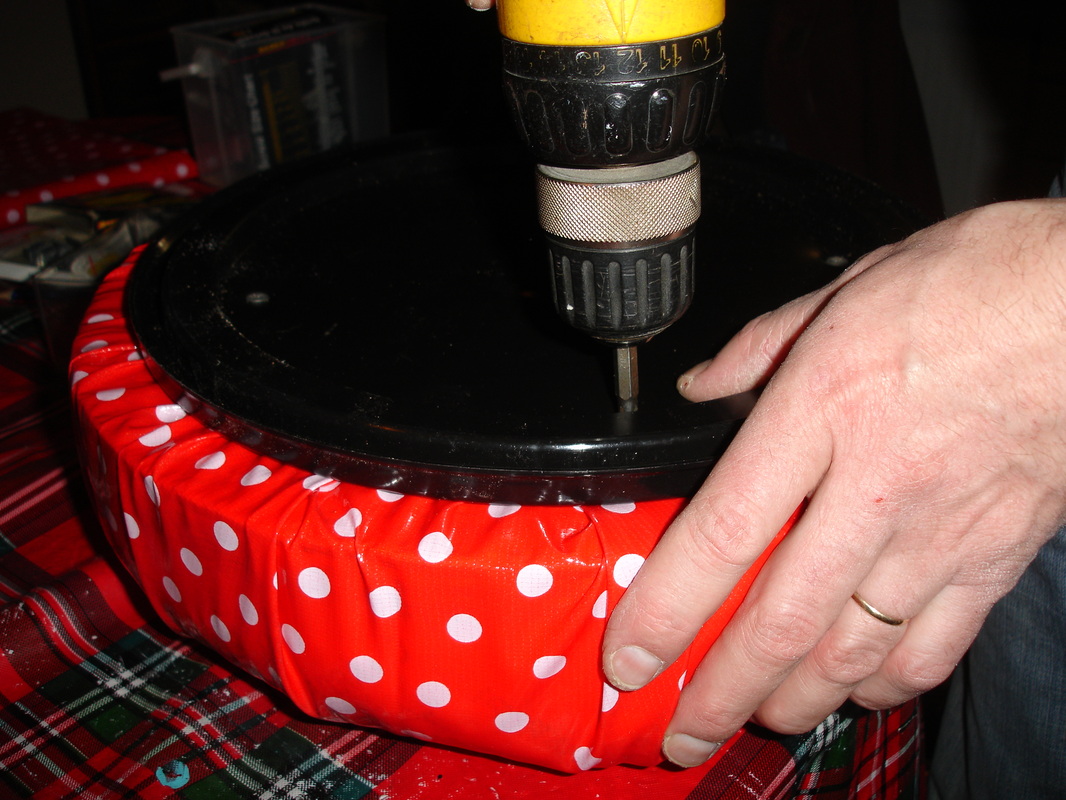
Once the vinyl is attached, we screwed the lid of the bucket onto the base of seat.